Are you getting ready to list in Sudbury and wondering how to make your home stand out online and in person? You are not alone. In a market where many homes list in the low-to-mid $1M range, buyers expect clean, move-in-ready spaces that photograph beautifully and feel effortless to live in. In this guide, you will learn the most effective, Sudbury-specific staging strategies, what to prioritize by room and home style, realistic budgets and timelines, and a simple two-week plan you can follow. Let’s dive in.
Why staging matters in Sudbury
Sudbury attracts buyers who value quality, convenience, and a refined New England look. With strong household incomes and a high rate of owner-occupancy, many local buyers arrive with higher expectations for presentation. Recent data from U.S. Census QuickFacts shows Sudbury’s household income well above state averages, which aligns with buyers who want finished interiors and strong curb appeal.
Staging responds directly to those expectations. According to NAR’s 2025 Profile of Home Staging, many agents report staging reduces time on market, and about 29% observed a 1% to 10% increase in the dollar value offered in specific cases. In a town where per-square-foot values are higher, even small percentage gains can be meaningful.
Start with high-impact basics
Before you add pillows or art, tackle the simple fixes that pay off quickly. NAR’s staging guidance recommends addressing repairs, cleaning deeply, decluttering, and maximizing light. These steps make every room feel larger and more inviting in photos and showings.
- Fix visible defects: tighten handrails, repair leaky faucets, replace burned bulbs.
- Deep clean: windows, grout, vents, and carpets.
- Declutter and depersonalize: remove 30% to 60% of small items and personal photos.
- Paint select rooms: use warm, neutral tones in main living spaces and the primary suite.
- Light it well: update dated fixtures and add layered lighting to remove shadows.
Rooms to prioritize
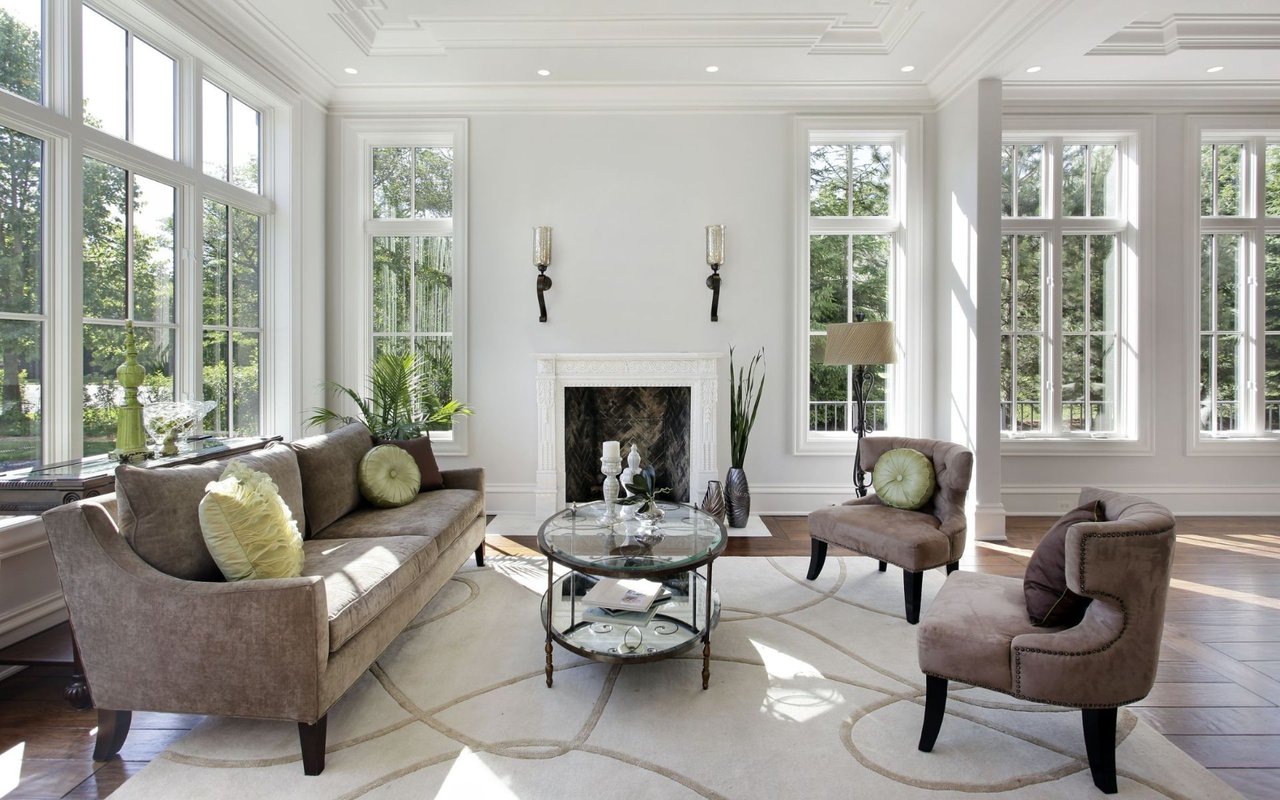
Industry surveys repeatedly identify the living or family room, kitchen, and primary bedroom as the most influential rooms to stage. Focus here first to drive buyer interest and set a consistent look throughout the home.
Stage for Sudbury home styles
Colonial and historic homes
Sudbury’s architectural character includes preserved districts and classic New England forms. Respect the story your home already tells by emphasizing period details rather than hiding them. Learn more about local context in Sudbury’s Historic Districts.
- Entry and staircase: keep the foyer open and bright. A slim console, mirror, and a scaled runner help the first impression read as classic and maintained.
- Fireplaces and millwork: arrange furniture symmetrically to frame fireplaces, built-ins, and crown moulding.
- Dining room: use a table and chairs that fit the room, a neutral rug, and simple artwork to reinforce proportion and form.
- Updated-but-cohesive: modernize kitchens and baths where needed, but avoid ultra-contrasting finishes that fight the period feel.
Contemporary and open-plan homes
Show flow and function. Use low-profile furniture so circulation is obvious at a glance. Keep surfaces clean and add area rugs to define zones for living, dining, and remote work. Highlight natural light and any direct access to decks or patios. These choices help buyers understand how the space lives day to day.
Higher-end and acreage properties
Convey scale and lifestyle. For larger or estate-style homes, invest in elevated staging rentals, curated art, and outdoor vignettes that define patios, firepits, and garden rooms. Twilight photography and thoughtful drone imagery often deliver outsized results when a property sits on a significant lot. Industry snapshots from RESA statistics show staging ROI is especially strong in upper price tiers.
Occupied vs. vacant: choose the right approach
Occupied homes
A stager consult plus targeted edits often delivers most of the benefit at a lower cost. Focus on the living or family room, kitchen, and primary bedroom. Remove personal items, rearrange for clean sightlines, and swap in a few neutral accessories and textiles to tie the palette together.
Vacant homes
Vacant rooms can feel smaller and colder in photos. If budget allows, physically stage key areas so buyers understand scale and function. High-quality virtual staging can be a cost-effective alternative for some rooms, but follow NAR’s staging guidance: disclose virtual images where required and never alter room dimensions or permanent features.
Make your media work harder
Photos are the first showing. NAR’s research identifies photos as the most useful online listing feature for buyers, which means staging and photography should work together. Schedule a professional real estate photographer after staging is complete, then plan these must-have shots:
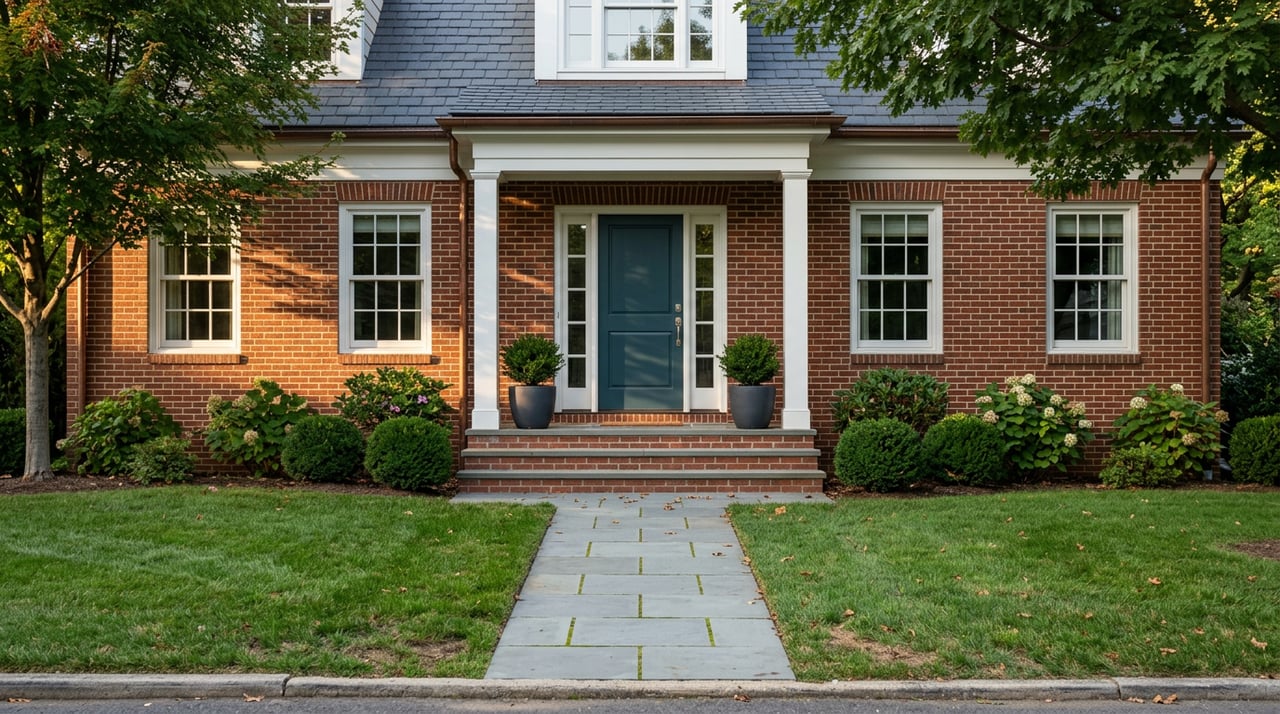
- Front exterior with strong curb appeal
- Living or family room, kitchen, and primary bedroom as “hero” images
- Backyard, deck, and any indoor-outdoor connection
- Lifestyle vignettes that show scale and function in larger rooms
- Aerial or twilight images for acreage and luxury listings
Richer image sets often drive more engagement. Lead with your best front exterior photo, then move inside to your strongest staged rooms.
Budget, timeline, and ROI
A common staging investment falls between $1,000 and $6,000 for the initial listing period, with recent quarter averages in the low-to-mid $3k to $4.4k range, according to RESA statistics. For many Sudbury homes, this spend compares favorably with potential price improvements and reduced time on market.
Timeline expectations:
- Prep: 1 to 3 weeks for repairs, cleaning, decluttering, and paint touchups
- Install: 1 to 3 days for staging setup and styling
- Rentals and logistics: 7 to 14 days lead time for premium furniture in busier seasons
NAR’s data indicates staging can reduce time on market and, in some cases, lift offers by 1% to 10% (NAR’s 2025 Profile of Home Staging). In a higher-priced market, this can translate into a significant return.
A simple 2-week staging plan
- Days 1–3: Knock out quick repairs, complete a deep clean, declutter, and decide which rooms to stage physically versus virtually.
- Days 4–7: Paint touchups, exterior tidy, and a final stager consult. If renting furniture, place orders now.
- Days 8–10: Staging install and final styling. Walk the home with your agent and photographer to confirm priority angles.
- Day 11: Professional photography and, for the right homes, a video or 3D tour. Add twilight or aerials for acreage or luxury.
- Days 12–14: Go live, launch marketing, and schedule showings. Use early online engagement to fine-tune photo order and captions.
Room-by-room quick wins
Living or family room
Scale furniture to the room and create a conversational grouping. Clear pathways and add layered lighting with a mix of overhead, floor, and table lamps. Keep surfaces styled but minimal so the room reads calm and spacious.
Kitchen
Clear the counters and store small appliances. Style a single vignette such as a bowl of citrus or a clean cookbook stand. Make sure hardware and fixtures are polished and the sink area photographs well.
Primary bedroom
Make the bed the focal point with crisp bedding and two to three pillows per side. Remove extra furniture and personal items. Use matching lamps and neutral art to create a restful look.
Bathrooms
Aim for a spa feel. Use fresh white towels, clear counters, and replace tired shower curtains. Re-caulk and re-grout as needed, and add a simple plant or soap set for color.
Entry and staircase
In many Sudbury Colonials, the foyer and stair are the first impression. Keep the area open, add a small bench or console, use a proportionate runner, and ensure the staircase is spotless and well lit.
Seasonal curb appeal in New England
Curb appeal matters in Sudbury’s historic neighborhoods and on larger lots. Fresh mulch, trimmed beds, a clean walkway, and a welcoming front door set the tone before buyers step inside. In winter, clear snow and ice thoroughly, add warm lighting at the entry, and keep indoor temperatures comfortable so showings feel inviting.
Ready to list with confidence
When presentation matters, the right partner makes all the difference. Darlene & Company delivers concierge-level listing preparation with staging consultation, professional photography and video, and coordinated sell-and-buy planning so your move is smooth and your results are strong. If you are thinking about selling in Sudbury, connect with Darlene Umina to get your free home valuation and move plan.
FAQs
What does home staging cost in Sudbury?
- Industry snapshots from RESA place typical investments around $1,000 to $6,000 for the first 60 days, with recent quarter averages near $3k to $4.4k. Higher-end or vacant homes may require more, especially if renting premium furniture.
Which rooms should I stage first for the best return?
- Focus on the living or family room, the kitchen, and the primary bedroom. These spaces most strongly influence buyer perception and can determine whether someone books a showing.
How long does it take to get market-ready?
- Plan 1 to 3 weeks for repairs, deep cleaning, decluttering, and paint touchups, then 1 to 3 days for staging setup. Schedule professional photos immediately after staging is complete.
Is virtual staging enough for a vacant home?
- It can work for select rooms and price points, but many $1M-plus homes in Sudbury benefit from physical staging in key areas. If you use virtual staging, disclose it and do not alter room dimensions or permanent features.
Do I need to stage if my home is already updated?
- Yes. Even beautifully renovated homes photograph better with scaled furniture, neutral styling, and clear focal points. Staging helps buyers understand scale and flow, which drives more showings and stronger offers.